September 24, 2026 • Kwame Osei-Bonsu • 10 min reading time • Prices verified June 18, 2026
Security Camera Mounts, Bases, and Hardware Failures: What Buyers Wish They'd Known
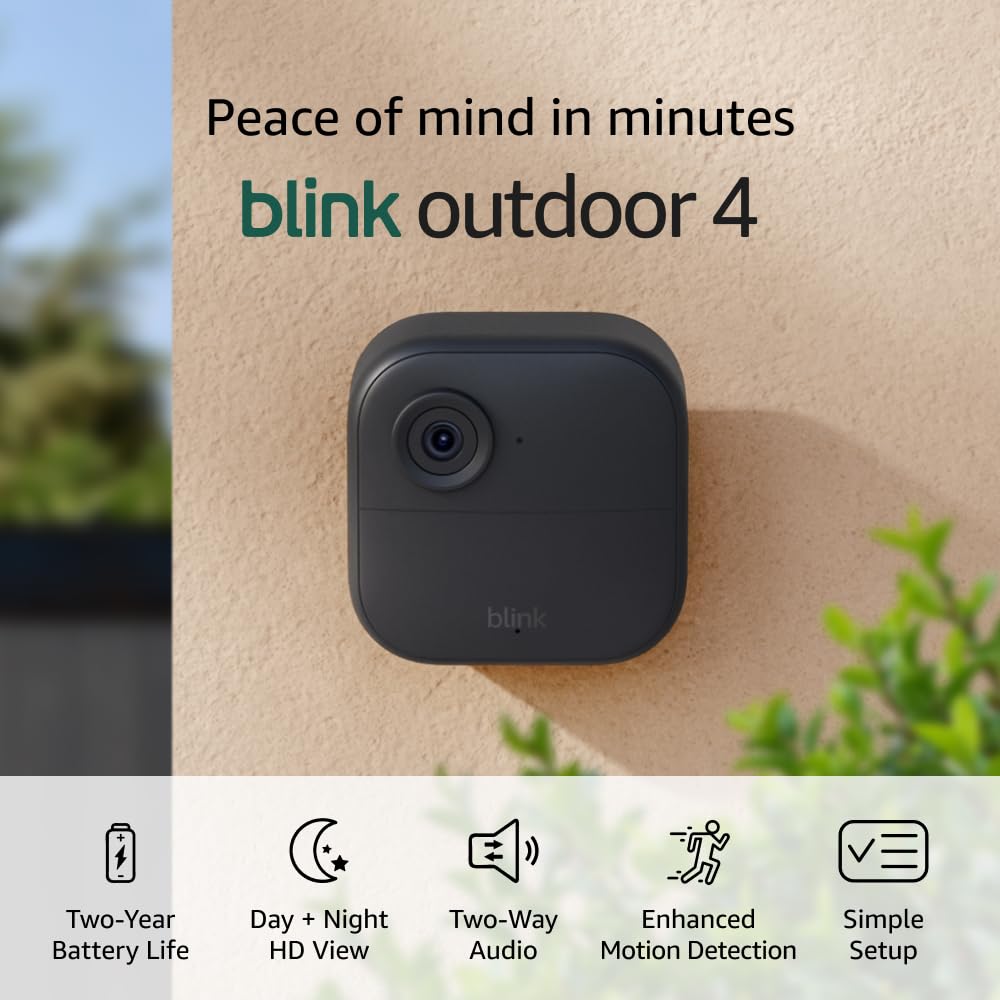
Security cameras protect your home. The mount is what protects the camera — and it’s the one part almost nobody researches before buying. A mount is simply the bracket, base, arm, or clip assembly that holds the camera to your wall, soffit, or fence post. It sounds like a minor detail until your camera is staring at the sky three weeks after install because the plastic swivel stripped, or you’ve snapped the base clip trying to attach a brand-new device before it ever recorded a single frame.
This guide is for buyers who are past the “which camera should I buy?” question and into the more granular territory of: will this actually stay where I put it, survive a Wisconsin winter, charge reliably on my detached garage, and work on my Starlink connection? These are real problems from real installs, drawn from aggregated owner reviews and manufacturer documentation. By the end, you’ll have a clear decision framework — including the specific pre-purchase questions to ask before you commit to a camera platform.
| EDITOR'S PICKBlink Outdoor 4 XR – two-year b… | Mid-tierBlink Outdoor 4 – Wireless smar… | Budget pickBlink Outdoor 4 – Wireless smar… | |
|---|---|---|---|
| Sync Module | Sync Module XR | Sync Module Core | Not included |
| Cameras | 4 | 3 | 1 |
| Range | 1000 ft open-air | — | — |
| Resolution | — | 1080p | — |
| Two-Way Talk | — | ✓ | ✓ |
| Price | $104.99 | $65.99 | $23.99 |
| See on Amazon → | See on Amazon → | See on Amazon → |
The Blink Outdoor 4 Base Problem: A Pre-Purchase Warning
The most concrete and specific hardware complaint across the Blink Outdoor 4 owner review pool centers on a single, fixable problem: the base clip assembly snaps under uneven pressure during initial setup. This isn’t a rare outlier — it surfaces consistently enough across aggregated reviews that it deserves a standalone warning before you buy.
The failure pattern is predictable. Buyers attempt to seat the camera into its mount by pressing on the device while it’s still in-hand or propped at an angle. The clip — which locks the camera body into the rotating base — receives torque from one side rather than even compression, and the plastic tab breaks. The camera never records a single frame.
The fix, documented by owners who figured it out the hard way: lay the camera flat on a table before snapping the base clip into place. The table surface distributes pressure evenly across the clip mechanism, eliminating the lateral stress that causes the break. This is not in the printed quick-start guide with any prominence, which is why so many buyers hit the problem anyway.
Tom’s Guide’s Blink Outdoor 4 review notes that the mounting hardware design is functional but requires careful handling — the lightweight construction that makes these cameras so easy to position is the same reason the base tolerates less installation force than heavier-built alternatives.
If you’ve already purchased the Blink Outdoor 4 and snapped the base: Blink’s customer support has reportedly replaced base assemblies under warranty when the break occurs during initial setup. Contact them before ordering a replacement unit.
The Blink Outdoor 4 XR appears to address this partially. Owners consistently describe the overall build as “beefier” than prior generations — the housing feels more substantial and the assembly process generates fewer of the base-clip complaints seen in Outdoor 4 reviews. If your install requires a lot of repositioning or you’re setting up multiple units across a property, the XR’s improved construction is worth factoring into your platform decision.
Solar Camera Charging: Why Day One Is Always a Lie
Solar-powered security cameras — cameras that run on a small onboard or attached solar panel instead of wired power or replaceable batteries — have become one of the fastest-growing segments in residential security. They’re especially appealing for detached garages, barns, gates, and any location where running wire is expensive or impractical.
The single most common post-install complaint, documented extensively in aosu and SEHMUA solar camera owner reviews, sounds alarming but isn’t: the camera doesn’t fully charge on the first day. Owners consistently describe assuming the unit was defective, checking connections repeatedly, and sometimes initiating a return — before discovering the camera charged normally on the first clear, full-sun day.
Here’s the physics: most residential solar security cameras arrive with a partial factory charge — enough to boot and connect, but not enough to reach full capacity. The onboard solar panel on a typical budget-to-mid-tier unit (rated around 3–6 watts) needs several hours of direct sunlight to push the battery from partial to full. An overcast install day, a shaded mounting location, or a north-facing panel all extend that timeline significantly.
By the numbers — solar panel orientation effects on daily output:
- South-facing, unobstructed: ~100% of rated daily watt-hours
- East/West-facing: ~70–80% of rated output
- North-facing, mid-latitude US: ~40–55% of rated output
- Partial shade (1–2 hours/day): reduces output by 30–60% depending on panel type
ARCCTV owners make a specific and useful recommendation in long-run reviews: don’t finalize your mount placement on a cloudy day. Wait for a clear forecast, mount the camera, and let it run for 6–8 hours before evaluating charge behavior. This eliminates the “is it broken or just cloudy?” uncertainty that generates a significant share of unnecessary returns.
North-facing placement — a question that comes up constantly in solar camera communities — is worth addressing directly: yes, it matters, and meaningfully so. At mid-latitude US locations (roughly 35°N to 48°N, covering most of the continental US population), a north-facing panel receives substantially less direct sun than south or east/west orientations. For cameras with smaller panels (under 4W), north-facing mounting in winter months can produce insufficient charge to maintain the battery through multi-day overcast periods. If north-facing is your only option, look for cameras with larger panels (6W+) or battery capacity above 10,000 mAh.
CNET’s overview of best solar security cameras consistently flags panel wattage and battery capacity as the two specs to prioritize over camera resolution for long-term solar reliability — a useful counterintuitive framing for buyers focused primarily on image quality.
Detached Garages, Rural Properties, and Connectivity Reality
A security camera mount that physically holds perfectly is useless if the camera can’t maintain a stable connection. For owners installing on detached garages, outbuildings, or rural properties — the connectivity constraint is often more limiting than the hardware itself.
The standard WiFi range limitation for most residential cameras is 150–300 feet in open air, dropping significantly through walls, metal siding, or building materials. A detached garage at 80 feet is often fine; a barn at 250 feet with a concrete block wall in between is frequently not.
Three viable approaches for detached structures:
-
WiFi range extender or mesh node — places a secondary access point inside or near the outbuilding. Reliable, relatively inexpensive, requires either a power source in the outbuilding or a weatherproof outdoor mesh unit.
-
Dedicated cellular camera — operates on LTE/5G independently of your home WiFi. Higher monthly cost, but eliminates the dependency entirely. SafeWise’s wireless camera guide identifies this as the clearest solution for outbuildings beyond 200 feet from the main structure.
-
Local NVR with point-to-point wireless bridge — enterprise-adjacent, involves running a dedicated wireless link between buildings to feed a local network video recorder. Appropriate for landlords or STR hosts managing properties with multiple outbuildings.
The ANSQUE camera has accumulated a notable cluster of positive reviews specifically from rural Starlink users — a segment underserved by most mainstream security guides. Starlink’s latency profile (which has improved substantially from its early high-latency days) is now compatible with real-time camera streaming and motion alerts. ANSQUE owners on Starlink specifically call out flawless compatibility, which is worth flagging for rural buyers who’ve been told “wireless cameras don’t work on satellite internet” — that advice is increasingly outdated for low-earth-orbit satellite services.
Security.org’s DIY installation guide notes that the camera-to-router distance spec on product pages is measured in optimal open-air conditions, not through building materials. Always assume real-world range is 40–60% of the stated maximum when walls, siding, or obstructions are involved.
Frequently Asked Questions
Why did my Blink Outdoor 4 base snap when I was putting it together?
The base clip mechanism on the Blink Outdoor 4 is sensitive to uneven lateral pressure during installation. If you’re pressing the camera into the mount while holding it at an angle — or pressing on one side of the housing rather than evenly — the plastic tab that locks the body into the swivel base can fracture. The fix is simple and consistent across owner reports: set the camera flat on a table, align the clip, and press straight down with even pressure. Contact Blink support if the break happened during initial setup; warranty replacement has been available for this specific failure mode.
How far can the Blink camera actually be from the Sync Module?
Blink publishes a range of up to 100 feet between a Blink camera and its Sync Module (the small hub that bridges cameras to your WiFi network). In real-world installs, owners consistently report reliable performance in the 50–75 foot range through typical residential walls and materials. PCMag’s Blink ecosystem coverage notes that connection reliability degrades meaningfully beyond 75 feet in multi-wall scenarios. If you’re mounting at the edge of that range, position the Sync Module centrally in the home rather than near the router.
Why isn’t my solar security camera charging on the first day?
This is normal and not a defect. Cameras typically ship with a partial battery charge, and a single overcast or partially shaded install day may not generate enough solar output to reach full capacity. Give the camera one full-sun day before troubleshooting. Also verify the panel is oriented toward the south (in the northern hemisphere) and is free of obstructions — even partial shading from a roof overhang or tree branch can significantly reduce output.
Can I use wireless solar cameras on a detached garage with no WiFi?
Yes, with the right approach. If your detached garage has power, adding a WiFi extender or a mesh satellite node is the most straightforward solution. If there’s no power available, a cellular-connected camera (operating on LTE/5G) eliminates the WiFi dependency entirely. Owners of ANSQUE cameras specifically report reliable performance in rural environments using Starlink as the home internet source — demonstrating that satellite internet is now a viable platform for wireless security cameras.
Does north-facing placement actually matter for solar panel output?
Yes, substantially. At typical US latitudes, north-facing solar panels receive 40–55% of the daily output of south-facing panels. For cameras with small panels (under 4W), this can mean the panel cannot maintain the battery through multi-day overcast periods — particularly in winter. If north-facing is your only viable mounting position, prioritize cameras with higher-wattage panels (6W+) and larger battery reserves. The trade-off between camera placement (coverage angle) and panel placement (sun exposure) is real and worth evaluating before you drill.
The Decision Frame: If X, Then Y
The hardware failure patterns in this guide point to a clear pre-purchase checklist:
- If you’re buying Blink Outdoor 4: plan the table-press installation technique before opening the box. If your install involves frequent repositioning or multiple units, evaluate the Outdoor 4 XR for its improved build quality.
- If you’re installing solar cameras on a detached structure: schedule your final mount placement for a clear-forecast day, confirm south or east/west panel orientation, and budget for at least 48 hours of normal sun before evaluating charging behavior.
- If your install is beyond 150 feet from your router, or involves a detached building: solve connectivity first, camera selection second. A mesh node, range extender, or cellular camera makes the hardware decision easier — and prevents a working camera from being stranded on a dead connection.
- If you’re on Starlink in a rural area: modern low-earth-orbit satellite latency is compatible with wireless security cameras. ANSQUE is the most cited platform among rural Starlink owners in current review pools, but the compatibility extends to most cameras that support standard 2.4GHz or 5GHz WiFi.
The mount, the base, the panel angle, the sync distance — none of these are glamorous specs. But they’re the ones that generate the most post-install regret. Getting them right is the difference between a security system that works on day one and a return label you didn’t plan for.