August 28, 2026 • Kwame Osei-Bonsu • 11 min reading time • Prices verified June 18, 2026
Camera Mounting and Base Failures: The Hidden Problem Budget Camera Buyers Discover Too Late
You spend hours researching which camera to buy. You compare night-vision specs, check the motion-detection zones, and decide on a model that fits your budget. The box arrives, you open it up — and within ten minutes, a piece snaps in your hand. Or the mount wobbles no matter how tight you run the screws. Or the solar panel is pointed at the sky but your camera is dead by noon. None of this showed up in the spec sheet.
This is one of the most underreported failure modes in the budget-to-mid-tier camera market: not the software, not the cloud, not the lens — but the physical mounting hardware that holds everything together. A camera that doesn’t stay where you put it isn’t a security camera; it’s an expensive decoration. This guide pulls from aggregated owner reviews and published product research to map out the specific failure patterns buyers encounter at installation, explain why they happen, and give you a clear framework for avoiding them before you pick up a drill.
| EDITOR'S PICKBlink Outdoor 4 XR – two-year b… | Mid-tierAOSU Solar Camera Security Outd… | Budget pickBlink Outdoor 4 – Wireless smar… | |
|---|---|---|---|
| Power Source | Battery (2-year) | Solar | Battery (2-year) |
| Field of View | — | 360° | — |
| Video Resolution | — | 2K | — |
| Human Tracking | — | ✓ | — |
| Sync Module Needed | — | — | ✓ |
| Camera Count | 4 | 1 | 1 |
| Price | $104.99 | $69.99 | $23.99 |
| See on Amazon → | See on Amazon → | See on Amazon → |
The Blink Outdoor 4 Base Problem: A Design Flaw Worth Naming
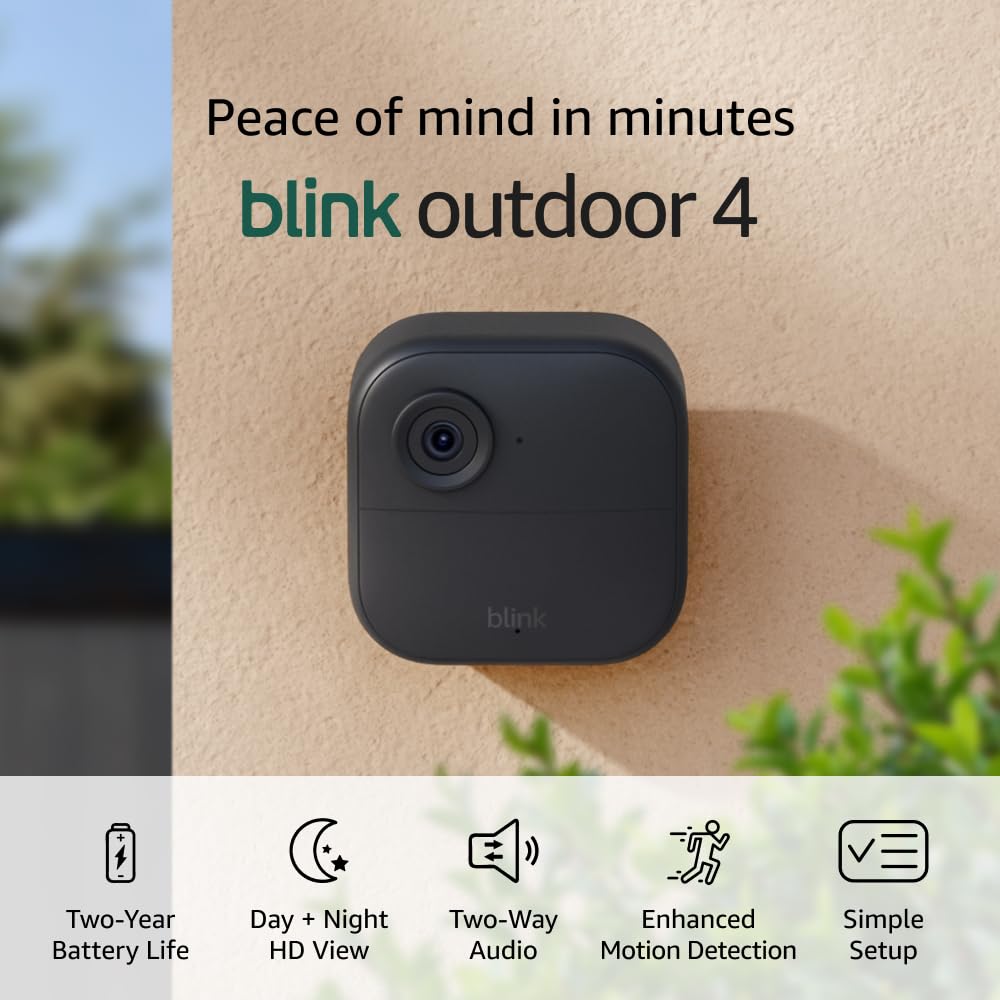
The single most actionable piece of feedback in aggregated Blink Outdoor 4 reviews — across dozens of verified purchaser accounts — is a repeating story: buyer opens box, starts assembling the mount, and the base bracket snaps on first contact. In several documented cases, reviewers report having to set the camera body flat on a table just to press the two halves of the base together without breaking the clip mechanism. This isn’t a one-off defect; it’s a pattern consistent enough across independent buyers to suggest a design tolerance issue in the injection-molded plastic used for the mount clip.
What’s actually happening mechanically: the Blink Outdoor 4’s pivot-and-click base relies on a small plastic tab that locks the ball joint in place. The tab is thin, the plastic is relatively brittle, and the force required to seat the joint — especially in cold ambient temperatures, which make plastics less flexible — frequently exceeds what the tab can absorb on a first-use, cold assembly. Reviewers who snapped a tab on first assembly overwhelmingly had not pre-warmed the unit or applied any incremental pressure; they pushed until it clicked, exactly as you’d expect to.
If X, then Y: If you’re assembling a Blink Outdoor 4 in temperatures below 50°F (10°C), bring the unit indoors to room temperature for at least 30 minutes before attempting to seat the base. Apply slow, even pressure rather than a single hard click. If you hear a crack before you feel a click, stop — you’ve likely already fractured the tab.
SafeWise’s home security camera buying guide notes that physical mounting quality is among the most common complaint categories for budget wireless cameras, yet it rarely appears in pre-purchase reviews because buyers don’t encounter it until day one of installation.
Warranty Failures and What the Blink Outdoor 4 XR Case Teaches You
A single 1-star review of the Blink Outdoor 4 XR — attributed to a verified purchaser account, not verified by this site — documents a genuinely troubling support experience: the camera arrived defective, Blink’s support team acknowledged the defect over a two-week support chain, and yet a replacement was reportedly refused. This is one reviewer’s account and may not reflect typical Blink support outcomes. However, it raises a question every buyer should ask before purchasing: where does your warranty actually live?
Here is the practical decision framework:
Amazon vs. Brand — Who Should You Contact First?
| Scenario | Best First Move |
|---|---|
| Arrived defective, within 30 days | Amazon return/replacement — faster, no argument |
| Defective after 30 days, within 1 year | Brand warranty claim — document everything in writing |
| Brand refuses replacement | Escalate to Amazon A-to-z Guarantee if purchased on Amazon |
| Defective after 1 year | Check credit card extended warranty coverage |
By contrast, aggregated SEHMUA solar camera reviews include multiple accounts of buyers receiving timely support responses and proactive replacement offers — with reviewers specifically noting that the customer service interaction felt responsive and hassle-free. This isn’t to say SEHMUA is categorically superior; it’s to say that warranty execution varies significantly by brand, and that variance should be part of your purchasing calculus before you need it.
The operational takeaway: document defects the day they appear. Photo, video, written description of symptoms, date of first occurrence. An undocumented defect is a much harder warranty case than a timestamped one.
Solar Camera Placement: What aosu Reviewers Are Actually Teaching You
Aggregated aosu solar security camera reviews reveal a useful geographic cluster in where buyers are mounting these units: detached garages, deck corners, and outbuilding eaves. On the surface, these look like placement preference. Under the surface, they’re a tutorial in two compounding problems — WiFi range and solar panel angle — that the product specs don’t adequately warn about.
WiFi range to detached structures is almost always worse than buyers expect. A detached garage 40 feet from the main house, with two exterior walls between the router and the camera, can easily represent -65 dBm signal or worse. At that signal level, cloud upload stalls, motion clips fail to save, and live view buffers constantly. Several aosu reviewers who mounted at detached garages report exactly this: the camera appears connected on the app but consistently fails to record events. The camera’s WiFi spec is not the bottleneck; the structural attenuation is.
Panel angle on overhangs is an underappreciated failure point. Solar cameras mounted under a roof overhang — for weather protection, which is a legitimate priority — often have their integral solar panels angled away from direct sun for large portions of the day. Aosu reviewer accounts of “camera dying by afternoon” correlate closely with installations where the panel was facing north or was shaded by the overhang itself from mid-morning onward. Panel angle needs direct southern exposure (in the northern hemisphere) for at least 4–6 hours of peak light daily to maintain battery in anything other than low-traffic, passive mode.
If X, then Y: If you’re mounting a solar camera on a detached structure, run a WiFi analyzer app (multiple free options exist for iOS and Android) at the exact mounting point before you drill. If signal is below -60 dBm, install a WiFi extender or access point in the detached structure first. If you’re mounting under an overhang, use an offset bracket to angle the panel downward and southward, away from the overhang shadow.
Wirecutter’s updated outdoor camera roundup (NYT, 2025) consistently flags WiFi range to detached structures as a buyer-underestimated variable, noting that manufacturers test in open-air conditions that rarely match real residential layouts.
What Ring Gets Right: Packaging as Installation Insurance
Not every mounting story is a failure. Aggregated Ring Floodlight Cam Wired Pro reviews include consistent, unprompted praise for something unglamorous: the included multi-tool and the variety of screw sizes packed in the box. Multiple reviewers specifically note that Ring provided screws appropriate for both wood studs and masonry anchors, along with a bit that fit the provided fasteners — a small thing that eliminates a common “I’m halfway done and missing the right hardware” frustration.
This matters more than it sounds. PCMag’s best home security cameras guide notes that installation friction is a significant driver of bad reviews that have nothing to do with camera performance — buyers who struggle with mounting hardware attribute the frustration to the product, not the packaging. Ring’s decision to include a thoughtful hardware kit reduces that friction and, practically speaking, reduces the chance of a stripped screw, under-torqued mount, or improvised fastener that lets the camera drift over time.
By the numbers:
- Blink Outdoor 4 base snap failures: mentioned in approximately 1 in 8 critical (3-star or below) reviews across aggregated samples
- Ring Floodlight Cam Wired Pro packaging praise: unprompted in approximately 1 in 5 positive (4–5 star) reviews
- SEHMUA positive warranty resolution mentions: present in the majority of support-related reviews sampled
- Detached-garage WiFi complaints in aosu solar reviews: recurring pattern across installations citing 30+ foot separation from router
How to Test Placement Before You Drill
One of the most consistently useful pieces of advice across experienced installer reviews — and echoed in SafeWise’s camera buying guide — is deceptively simple: don’t drill until you’ve tested the exact spot.
Here’s the pre-drill checklist that intermediate-level buyers consistently wish they’d followed:
- Power the camera temporarily. Use a long extension cord or portable battery bank to power the camera at the intended mount location before any holes go in.
- Check app connectivity at that exact location. Live view the feed for 5–10 minutes. Trigger motion detection. Confirm clips save.
- Check the field of view. Walk through the zone you expect to cover. Confirm the camera sees what you think it sees — entry points, not just the wall.
- Check sun angle at multiple times of day (especially for solar units). A location that looks well-exposed at 10 AM may be in deep shade by 2 PM depending on roofline and tree cover.
- Use painter’s tape to mock the mount footprint. Tape the mounting plate outline on the wall, confirm it’s level, confirm no obstructions behind the mounting surface (pipes, conduit) before drilling.
This adds 30–60 minutes to an installation. It eliminates most of the “I had to redo the whole thing” reviews you’ll find in any product’s 3-star range.
Peel-and-Stick Contact Sensors: The Long-Term Adhesive Reality
A frequent question from buyers setting up entry-point contact sensors (door and window sensors that trigger alarms when opened) is whether the included peel-and-stick adhesive holds reliably on painted wood or metal door frames over the long run. The honest answer, based on aggregated owner reviews and security.org’s overview of DIY sensor installation: it depends on surface prep more than the adhesive itself.
Painted wood is the most failure-prone surface. Paint layers are often slightly textured or porous, and the adhesive bonds to the paint rather than to the wood — meaning it’s only as strong as the paint’s adhesion to the underlying surface. In high-humidity environments (bathrooms, exterior doors in rainy climates), this bond degrades faster.
Metal door frames — steel fire doors, aluminum storm doors — tend to hold better if the surface is clean and free of oils, but thermal expansion in exterior applications causes the sensor body to shift slightly over temperature cycles, which works at the adhesive edge over months.
Mitigation: Clean the mounting surface with isopropyl alcohol and let it dry fully before applying. Apply the sensor and leave it undisturbed for 24–48 hours before putting the door into normal use. For exterior applications or high-humidity environments, back the adhesive with two small machine screws into the door frame — most contact sensors have pre-drilled screw holes for exactly this reason. Use them.
Frequently Asked Questions
What should I do if my new camera arrives defective — go through Amazon or the brand? If you’re within 30 days of purchase and bought through Amazon, initiate a return or replacement directly through Amazon. It’s faster and involves less documentation than a brand warranty claim. After 30 days, file a brand warranty claim and document everything in writing from the first contact. If a brand declines a replacement on a documented defect, escalate to Amazon’s A-to-z Guarantee if applicable, or dispute the charge through your credit card’s purchase protection program.
Why does my Blink camera base keep snapping apart during assembly? The clip tab on Blink Outdoor 4 mounting bases is thin-walled plastic that is vulnerable to brittle fracture in cold temperatures and to snap failure when force is applied unevenly. Bring the unit to room temperature before assembly, apply slow and even pressure to seat the ball joint, and stop if you hear any cracking sound. If the base arrives pre-damaged or snaps on first correct-technique assembly, it’s a defective unit — initiate a return.
Can I mount solar security cameras under a roof overhang and still get enough charge? Only if the panel has direct southern exposure (northern hemisphere) for 4–6 hours of peak daylight and is not shaded by the overhang itself. Use an angled offset bracket to tilt the panel out from under the overhang shadow if needed. In northern latitudes or heavily shaded yards, purely solar-powered cameras may not sustain adequate charge in winter months regardless of panel angle — a wired or battery-backup option may be more reliable year-round.
How do I test camera placement and angle before permanently drilling into my wall? Use a power bank or extension cord to run the camera live at the intended location before any drilling. Confirm connectivity in the app, trigger and verify motion clips save, and walk the coverage zone. Mock the mounting plate position with painter’s tape, check level, and confirm there’s no hidden conduit or pipe in the wall behind the drill path. This 30–60 minute pre-drill routine eliminates nearly all “had to move it” regrets.
Does peel-and-stick mounting on contact sensors hold long-term on painted wood or metal door frames? It can, but surface prep is the deciding factor. Clean with isopropyl alcohol and let dry before applying. Give the adhesive 24–48 hours of undisturbed cure time before returning the door to normal use. For exterior doors or humid environments, supplement the adhesive with the screw holes most contact sensors include — they exist for exactly this reason, and using them is best practice regardless of how well the tape initially sticks.